Search Other Sites

Friday, September 10, 2010

Starbucks Pumpkin Spice Latte

As promised! :)  Never actually had a Starbucks, but after making this, I suspect it comes pretty darn close to the way it tastes at Starbucks! :)  They are just SOO expensive and I made this with stuff I already had! :)  Super cheap! :)  And if you know me, if there's a way to "do it myself" I'll be doing it! :)

This recipe calls for "vanilla syrup."  They can be purchased in bottles at World Market I know, or someone informed me they are at the general grocery stores, but cost an arm and a leg!  So, I found a recipe for the vanilla syrup!

Vanilla Syrup:
2 c water
2 c sugar
2 T pure vanilla extract

Boil sugar and water together until sugar is dissolved.  Once simmering, let it lightly boil for about another 5 minutes and it will thicken.  Take OFF the burner and add the vanilla.  Let cool to room temperature and store in an airtight container for up to 2 weeks.


Pumpkin Spice Latte:
3T pureed pumpkin
2 T vanilla syrup
1/4 t pumpkin pie spice
1 c milk/cream
3 ounces espresso (1-2 shots)

In a small saucepan, whisk pumpkin and milk over medium-high heat.  Stirring regularly.  Add vanilla syrup and pumpkin pie spice and continue whisking.  Heat and stir until steam and foam begins to appear.  Usually about 5 or so minutes.  Pour this milk mixture into your mug and top with the espresso shots, stirring to combine.  Top with whipped cream and more pumpkin pie spice!

Thursday, September 9, 2010

Dinner Club

NEW CONCEPT! :)

WHO only wants to cook a meal ONCE a week M-TH and have the other three days already PREPPED? If that's you, read ahead.

You're asking, "WHAT IS THIS?" In short, you basically have FOUR families that work together to prepare meals for dinner. So, example, I will take Mondays (I will ALWAYS have Mondays) and prepare FOUR of the one meal and distribute to the other three families on that day by 4:00PM. There will normally be some "cook time" that you'll have to manage, but the prep will all be done. The idea is to have four families that either live in the same neighborhood, or have kids that go to the same school that pick up at the same time, etc. This way its little or NO running around for you. This DOES take a committment, and by that I mean, you can't just try for a week and drop out. There is an initial small out of pocket cost (approx. $20 or so) to buy enough pans, but if you drop out, you will get that money BACK once another person is found to replace your spot in club.


What are the benefits? You only cook ONCE for days Monday - Thursday. Save LOTS of money as you are not having to cook 3 out of 4 days your main meal. LESS DISHES! :) (Huge one for me! :))  The other benefit is that you will get to try different recipes that you probably wouldn't have tried otherwise!

So, to begin, you have to have 6 Pyrex glass 9x13 WITH LID, and 6 Pyrex glass 8x8 pan WITH LID, allowing for every one's meals to be brought and served in those same pans over and over and over. If you start out with this many pans, no one will be “running their pans” to some one's house, if coordinated correctly, they should trickle through each family in need that day perfectly. You can choose to do your meal in the 9x13 or the 8x8. But if you don't use one or the other, you will still circulate the pans every time you bring a meal. This is where you pay $25 for a pan set, EVEN IF YOU ALREADY HAVE SOME.

YOU WILL PREPARE (NOT BAKE) THE MAIN DISH, AND DOES NOT INCLUDE SIDES. So what you bring to us will be for example, Lasagna “prepared” but not baked. We will do the baking.  If our family wants a salad or garlic bread to go along with the "main dish" we are responsible for providing that.

Staples will be a necessity. Example. If you prepare Chicken Cordon Bleu that is a “meal on its own” but your family likes it served over spaghetti, you will need to provide your own pasta for that meal. If, however, you make “Spaghetti,” that is a meal you HAVE to have pasta for and therefore if you're making spaghetti, you'll need to provide the pasta for all four families.

Our group has been using Google Calendar to do all of our menu planning.  We have our meals planned out usually a month in advance.  So at the end of August, we were putting in OCTOBER'S menus.  End of September we'll be putting in NOVEMBER'S mernus.  You get the idea.  Having a calendar that everyone can see/share makes sure no one is repeating the same meal in the same week.  At the end of every week, we go into the calendar and "rate" our meals anonymously in the "location" section on the calendar event. We rate ours with a 1 - LOVE this meal, please make it again; 2 - Meal was tasty, but not necessarily begging for it again; and 3 - Family didn't care for at all, would prefer not to have it again.  This is not meant to be hurtful, just an opportunity for ALL of us to express our opinions as spokes people for our family. Your group will also have some base “rules,” these will be like allergies for a family, this is not “picky” rules. If you don't like green peppers, pick them out. The more specific you get the harder it is to do the club.

Cheat Days! TO BE USED RARELY! My friend that's been doing this for 1 ½ years has only had ONE cheat day in all that time, and each of the other families have only done ONE! Cheat days are if you JUST CAN'T GET THE MEAL PREPARED and you want to bring us all pizzas, or whatever. If we're only cooking once a week, this really shouldn't happen often anyway, but we DO understand if something comes up that was completely out of your control.

So, I think I've pretty much covered all the bases.  If something doesn't make sense feel free to contact me with questions at bbaltzly@gmail.com.

This is a picture of one of my meals ready to deliver!

Wednesday, September 1, 2010

HARVEST TO HOME ARIZONA!!!

Well, it's with great pride and excitement that I get to announce our new adventure that we are embarking on now.  For several months, we, along with another close family, have been making plans to start up a gardening business together.  Many of you know my husband, Ben, is an agronomist by education, a farmer, once by occupation on his dear families' farm, and is PASSIONATE about growing things.  Not to many months ago, we were visiting with some friends and were discussing the idea and our partner, David, and his wife thought Ben's idea was pretty cool!  So, the ball started rolling and Ben started doing some research and found another guy in California doing EXACTLY what Ben had been originally thinking!  A few phone calls later, we were figuring out logistics as to how we could get this type of thing going in Arizona! 

Harvest To Home Arizona was then born out of that.  In a nutshell, we deliver pre-planted, pre-fertilized organic gardens in a box to your place of interest.  You can pick from a menu of produce and herbs and we do the rest!  At drop off, we will hook it up to a water source available at your place and all you will need to do is WATCH the plants grow like crazy and when ready PICK your fresh produce RIGHT OUT OF YOUR OWN BACKYARD!  There are basically THREE "growing seasons" here in AZ.  Once your first season is through, we will come pick up your box(es) from your home and replant them for you with a new season!  These can be placed ANYWHERE at your home.  Front yard, back yard, if you live in a condo, you can put them on your deck, patio, etc.  Just need a water source and sun. 

Please visit our website (we're very soon going to be linked off of the California one) at http://www.harvesttohome.com/ to check out what we're up to!  Other contact info is as follows:

Specific Questions to AZ business - infoaz@harvesttohome.com
David Pascador (Owner) - david@harvesttohome.com
Ben Baltzly (Owner) - ben@harvesttohome.com
Harvest To Home Arizona Phone - 520-464-2300 (you'll hear my pretty little voice on that recording soon)
Facebook - facebook.com/HarvestToHomeAZ (go check us out and request to be friends)

Check back for more information on upcoming events and specials in the future!

First Shipment of plants came today!

Just a few examples of what we can plant!

These are the Chocolate Beauty Peppers!

They are actually already producing!  Do you see the peppers?

Here is an example of the herbs that we have!

Berrgarten Sage

Tuesday, August 31, 2010

Granny's Potato Salad

I think if you were to ask most of my Granny's 50+ grandchildren that they'd beg Granny to make her potato salad every time we are back visiting!  She has, hands down, THE BEST potato salad recipe you'll ever eat!


1 - 5 lb bag red potatoes
1 dozen eggs
2 c mayo/Miracle Whip
1/2 small jar pickle juice
1/2 c sugar
1 t garlic
salt & pepper, to taste
1 t celery seed

Wash red potatoes and boil in pan until you can stick a knife in them and pull it out without trouble.  Leave the skin on while boiling.  Drain and let cool to room temperature.  Peel the skins off once cooled and dice the potatoes into cubes.  Bring eggs to a boil in a pan of COOL water on the stove.  Once they are boiling, let them boil another 5 minutes, then shut the water OFF and leave them set ON the burner for another 10 minutes.  Drain water, cool, peel and cut.  In a bowl, mix the remaining ingredients until well blended.  Pour over the cut potatoes and eggs and mix until all the sauce has coated everything.  If it seems dry, make a little more dressing mixture and add until you like it.  Leave sit at room temperature for about 20 minutes before you refrigerate or eat.

Monday, August 30, 2010

Grandma's Taco Salad

This recipe is my Grandma Cowley's!  YUMMO!  My grandma CAN COOK!  She has entertained far more than most people I've ever met.  Love her heart of SERVICE.  We eat Taco Salad several different ways, so I'll share again a different recipe for another type (if you came to our adoption party for Chavalah, that is the recipe I'll post LATER) at a different time.


1 lb ground beef, browned and drained
1 can refried beans
1 pkg taco seasoning
1 sm can tomato sauce

Will also need:
lettuce
tomato
cheese

Combine all four ingredients over medium heat until heated all through and well combined.  Serve this meat/bean mixture over tortilla chips and top with cheese, lettuce & tomato.  With this kind of meat mixture you do NOT need salad dressing, but you may add if you desire.  You can also add anything else if you have a favorite topping.  A few other suggestions are guacamole, black olives, green onions, sour cream, etc.

Tuesday, August 24, 2010

Oreo Dessert

So, growing up, I grew up in Iowa!  My dad worked for John Deere and traveled MUCH!  The bulk of his trips were to Germany, but I won't ever forget the amazing opportunity it brought for me to learn other cultures and meet some really neat people that would also travel over here from Germany!  My mom had a heart of gold and was constantly inviting and hostessing many of these dear people in our home.  To this day we still have some very unique friendships with a lot of them.  I will also never forget my mom serving this to them on one of their many visits to the states and they would commonly call this dessert the "Iowa Dirt Dessert."  They thought the oreos look much like the rich soil of Iowa!  MAKES ME MISS HOME!  Many special things we've had to leave behind in the "Iowa dirt."
First layer smashed down on the bottom.

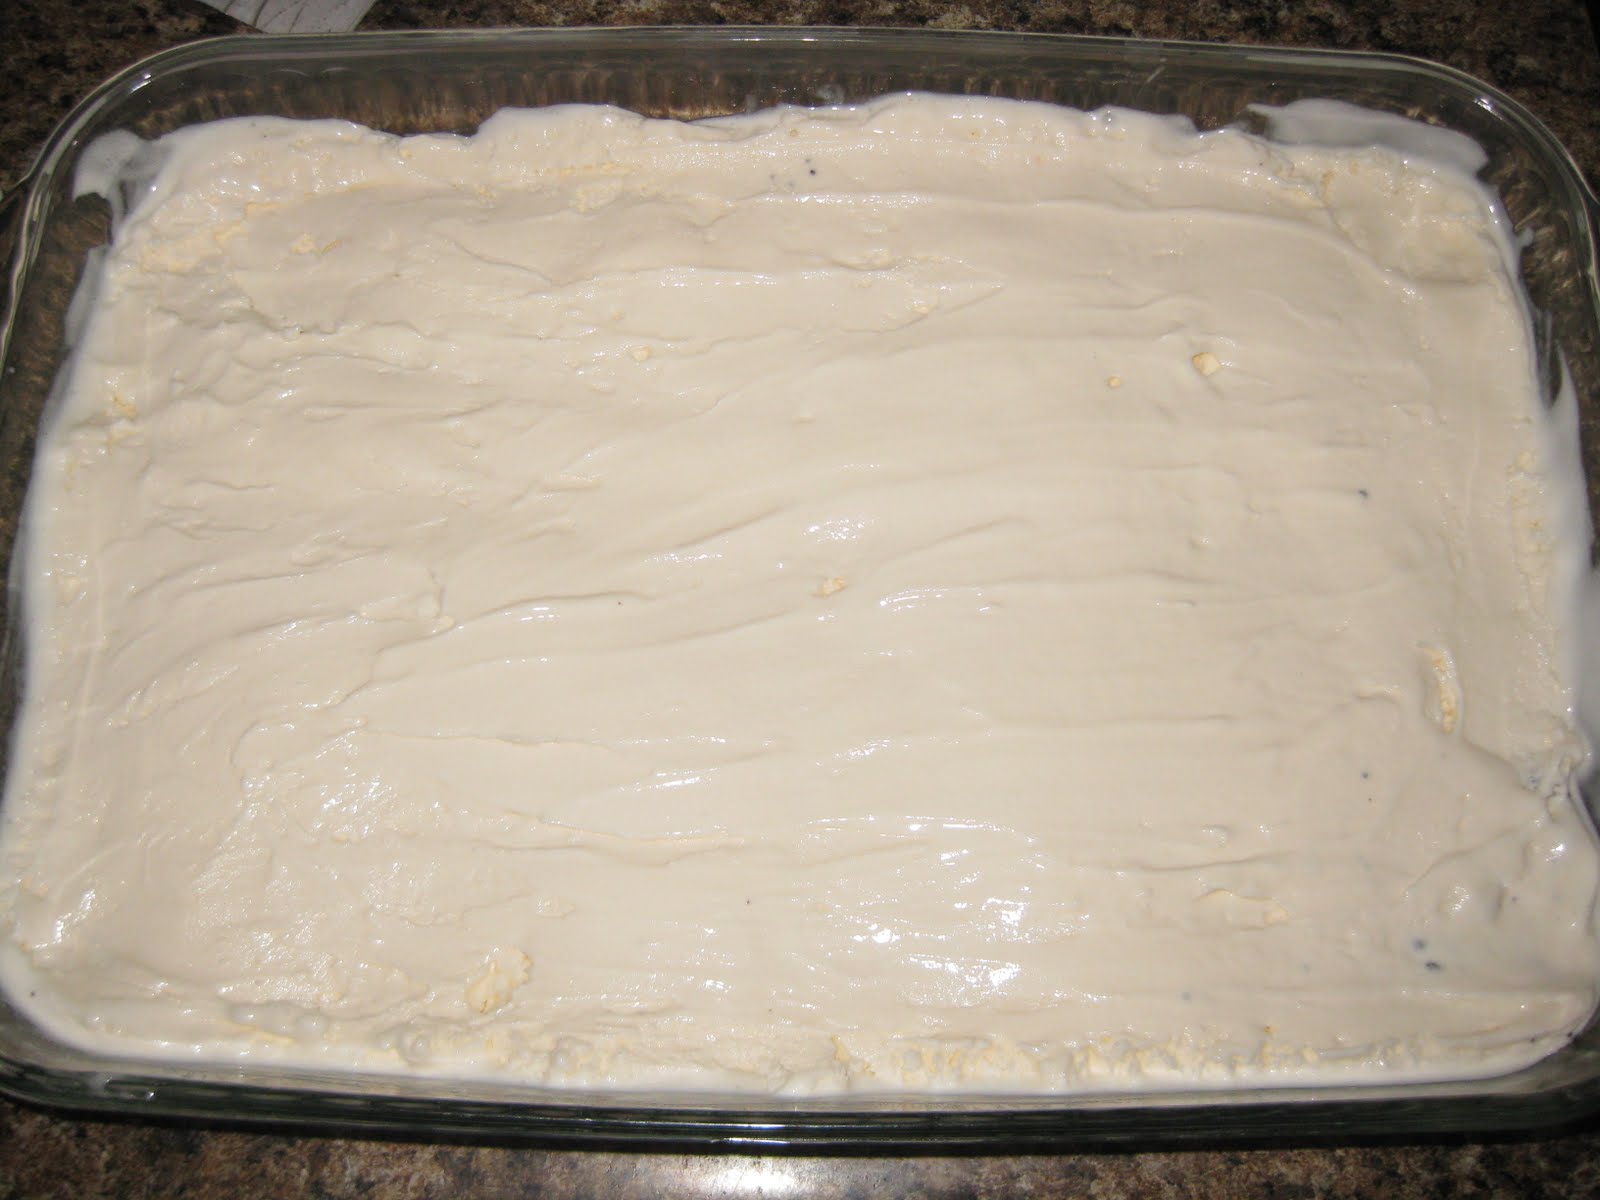
Ice Cream cut and smoothed.

Top layer of Oreos all spread out.


1 1/2 pkg Oreos (I used the Mint Oreos)
1 stick butter
1/2 c sugar
1 - 1/2 gal vanilla ice cream

Crush and blend the complete Oreo (all of them) in a blender.  I have to do mine in 1/3 pkg increments.  Put the blended Oreos into a bowl and add sugar and butter.  Stir until completely blended.  Pour half of the oreo mixture into the bottom of a 9x13 pan.  Press into the bottom.  Cut the 1/2 gallon of ice cream carton into 6 sections.  Piece together in the pan and then smooth together so all the oreos are covered.  Finish by pouring the remainder of the Oreo mixture over the top and smooth out.  FREEZE for at least 3 hours so it becomes solid again.  Cut and serve.

Monday, August 16, 2010

Creamy Alfredo


1 stick butter
3 cloves garlic
8 oz cream cheese
2 c heavy whipping cream
1 c parmesean cheese
1 box linguine or fettucine

Over medium heat in a saucepan, saute garlic in the butter until melted.  Add the entire cream cheese and let melt down.  Whisk to smooth the lumps out.  Add cream gradually while you continue to whisk.  Let heat to a slow heat and then lastly add the parmesean cheese until it is melted.  Keep warm until ready to serve.  Serve over linguine or fettucine.

Thursday, August 5, 2010

Broccoli Cheddar Soup

COMFORT FOOD!  Started loving this soup at Panera Bread back in the day!  Couldn't get enough of it!  Finally figured I'd probably save myself SO MUCH MONEY if I stopped buying it at Panera and made it for myself at home! :)  Have made it ever since! 


1/2 onion, chopped
1/4 c butter
broccoli (they usually have three in one rubberband), chopped
2 (14 oz) cans chicken broth
1 lb cheddar cheese, shredded
1 c milk
1 1/2 t garlic powder
1/3 c cornstarch
1/2 c water

Melt butter.  Cook onion in butter til soft. Stir in broccoli and cover with chicken broth.  Simmer until broccoli is tender, 10-15 minutes.  Reduce heat, stir in cheese until melted.  Mix in milk & garlic powder.  In small bowl, stir cornstarch into water until dissolved.  Mix into soup.  Cook & stir until thick.  Serve.

Monday, August 2, 2010

Pickles

So, I'm a HUGE fan of dill pickles!  Anybody with me!? :)  LOVE pickles.  I've since found out that Ezra is a HUGE fan as well! :)  He and I could both eat pickles until we're sick!  So, this was a HUGE discovery for me.  Saves much on the pocket book! :)  Pickles aren't cheap.

Cucumbers (not all of them) picked fresh from our garden!

Peeled!

Sliced!  The thinner the better.

Put in the jars!  You can see I didn't pack them in enough!

Prepared dill pickle packet in now.

9-11 lbs fresh cucumbers
1 packet dill pickle seasoning mix
3 1/3 c vinegar
7 1/3 c water
6-8 canning jars

Peel and slice cucumbers.  Fill the canning jars and pack them in from top to bottom.  Prepare the dill pickle mix according to the directions.  Pour over the top of the pickles until jar is full, leaving 1" space at the top.  Put lids on tight.  Careful not to burn self as jar is VERY HOT at this point.  Let them set, and throughout the next sevearl hours, you will hear the most thrilling sound!  The lids will *pop* one by one! :)  LOVE THAT SOUND!  These can be stored in room temperature until you use them.  Once they are opened they MUST be refrigerated.

Saturday, July 31, 2010

Spatzle

When my parents lived over in Germany on a 2 year term, they came back with this most favorite German dish and served it when they came back for Laine's adoption.  Won't ever forget it!  IT WAS AMAZING!  Still is.  As a special gift, they gave each of us (their three daughters) an actual Spatzle noodle maker, but I will give you a hint on how YOU can make the same noodles!


Pork Roast:

1 (3-5 lb) pork roast
1 pkg dry onion soup mix
water, to the top of roast

Spatzle:

1/2 c water
4 eggs
2 c flour
1 t salt
2 T oil

Gravy:

1 1/2 c pork juice (what it's been cooked in all day)
2 beef boullion cubes (or equivalent granules)
1/2 c cold water
1/4 c flour

Start a completely thawed pork roast in your crock pot EARLY so it has time to really slowly cook.  Put the pork roast in your crock pot and cover with one packet of onion soup mix and water to cover the entire roast.  Set on low for about 8 hours.  This will FALL APART and melt in your mouth after it's cooked like this.  Pull pork out from juice and it will literally shred apart onto a plate.  Just before the pork is finished, stir together the Spatzle ingredients.  Boil a large pot of water, salted.  Once at a rolling boil, with a FLAT cheese grader (not the square one), spoon batter over the top and with fingers finish forcing it to go through.  (CAREFUL NOT TO CUT YOUR FINGERS.)  Boil until the noodles float to the top. Strain in a colandar.  Repeat until all the batter is cooked.  Only do about 1 cup of batter at a time.  For the gravy, boil pork juice with 2 cubes beef boullion.  In a separate bowl, whisk water and flour until there are no flour lumps.  Once the broth is boiling, add flour/water mixture while constantly stirring.  It will thicken in less than a minute, then keep on low until ready to serve.

Serve by layering a heap of noodles, then pork, then gravy!